
How to Schedule Bobcat Work Without Delays

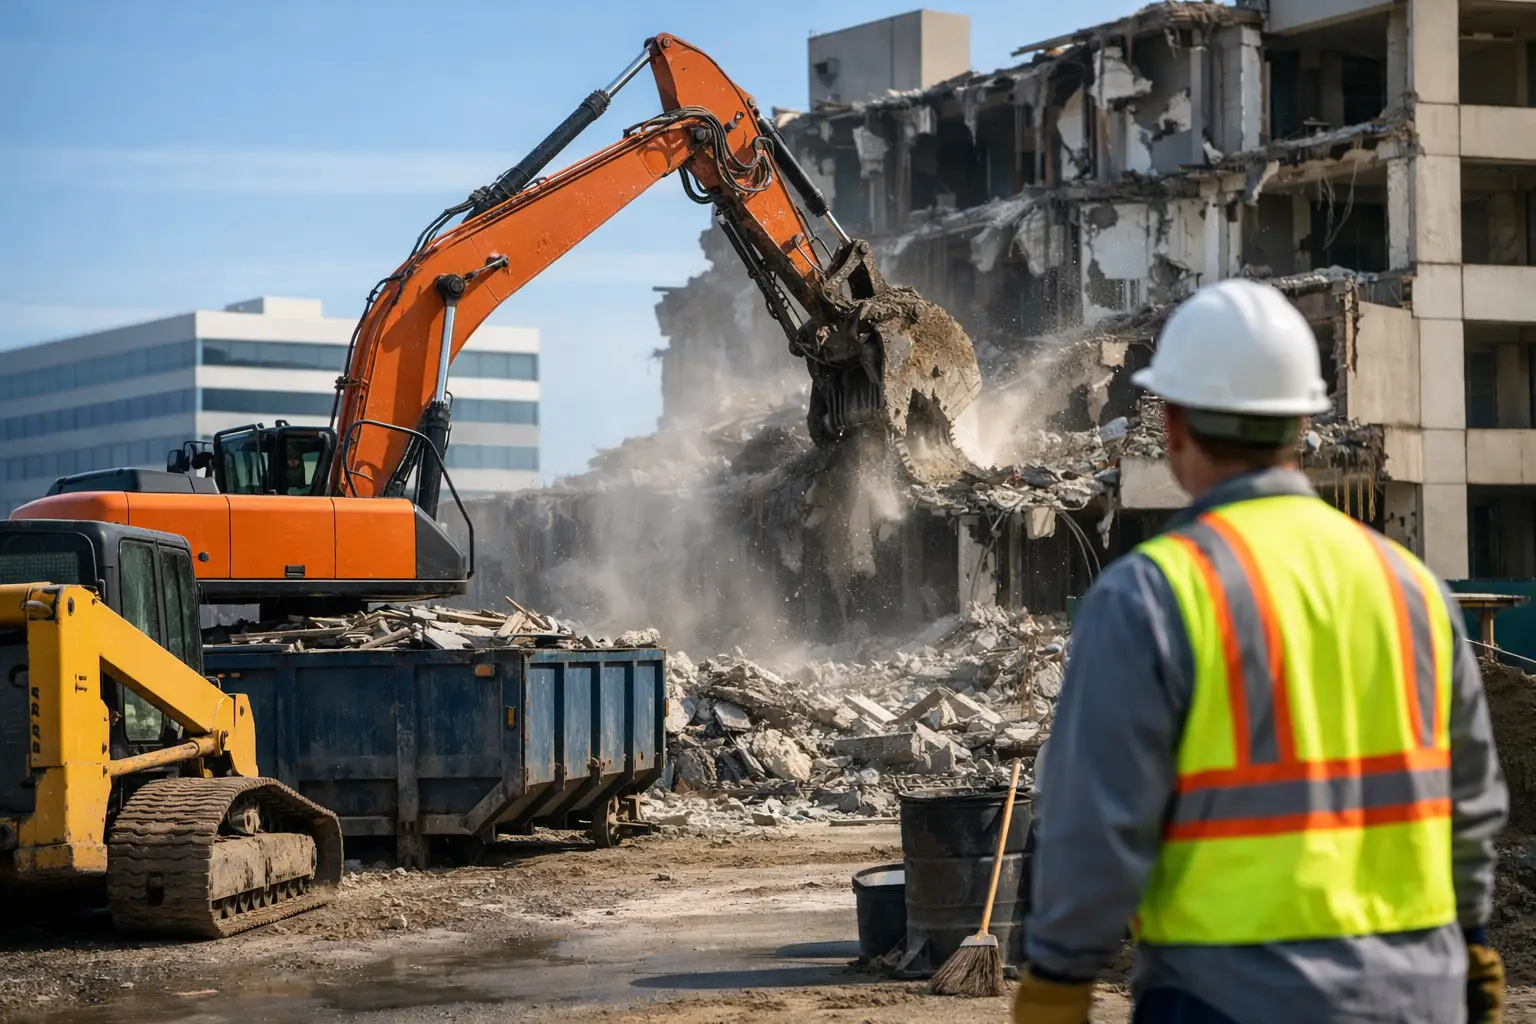
A pile of broken concrete, a backyard full of storm debris, or a driveway covered in renovation material can make a project feel stalled before the real work even begins. Knowing how to schedule bobcat work gives you a clear path forward: define the job, prepare access, line up materials or hauling, and book the equipment for the right window.

A Bobcat can move a lot of material quickly, but the best results come from planning the full job around it. If the machine arrives before debris is sorted, before a dumpster is placed, or before an access gate is opened, valuable time can be lost. A little preparation helps keep your property cleaner, your project on track, and your labor costs under control.

Start With the Job You Need Done

“Bobcat work” can mean several different things. For one homeowner, it may mean removing a mound of dirt after a pool project. For a contractor, it may mean loading demolition debris, spreading gravel, or clearing a work area before the next crew arrives. The schedule, attachment, and hauling plan can change depending on the task.

Before requesting a date, decide what you want the operator to accomplish. Be as specific as possible about the material and the finish you expect. For example, “move dirt from the front yard to the back” is different from “remove excess dirt from the property.” The first job requires space to relocate the material. The second requires a truck, trailer, or dumpster plan for hauling it away.

It also helps to estimate the size of the work area. You do not need perfect measurements, but a rough length, width, and pile height can make scheduling more accurate. Photos and a short video of the access route are often useful, especially when the work involves tight side yards, fences, landscaping, or limited parking.

Choose the Right Time to Schedule Bobcat Work

The right date depends on what has to happen before and after the machine arrives. If demolition debris needs to be loaded out, schedule the dumpster, trailer, or hauling service so it is available when the Bobcat is working. If you are receiving mulch, gravel, or fill dirt, arrange delivery before or at the start of the equipment appointment.

For many projects, booking Bobcat work early in the process prevents clutter from taking over the site. A crew can clear brush, broken concrete, old pavers, dirt, and debris so other trades have room to work. On the other hand, if interior demolition is still underway, it may make more sense to wait until most of the debris is outside and ready to be loaded.

Weather matters in South Florida as well. Heavy rain can turn soil into mud, create standing water, and make access unsafe or damaging to the property. A machine can still handle many wet-site jobs, but soft ground may leave ruts, reduce traction, or limit where material can be placed. If grading, trench backfill, or landscaping prep needs a clean finish, give the ground time to dry when possible.

Try to schedule with some flexibility. Same-day or next-day availability can be helpful for urgent cleanups, but projects with multiple moving parts are easier when you allow a backup window for rain, delayed deliveries, permit inspections, or a contractor running behind.

Give Clear Site Details When You Book

A fast quote and accurate schedule depend on good information. Let the service provider know where the work is happening, what material is being moved, and where it needs to go. Mention obstacles before the appointment, not when the machine is already at the curb.

The most useful details include:

  • The type of material, such as dirt, sod, gravel, concrete, brush, trash, or mixed construction debris
  • The approximate amount of material and the size of the work area
  • The narrowest access point, including gates, alleys, driveways, and side yards
  • Any obstacles such as fences, trees, sprinkler heads, septic systems, pavers, or parked vehicles
  • Whether material is staying on-site, being loaded for removal, or being spread across the property

Be honest about tight access. A compact machine is designed to work in smaller areas, but it still needs enough room to enter, turn, and operate safely. If access is too narrow, the crew may need a different approach, additional labor, or another location for loading material. Finding that out ahead of time is always better than changing the plan on the day of service.

Prepare the Property Before the Machine Arrives

The operator can work faster when the site is ready. Move vehicles out of the driveway and away from the loading area. Keep pets inside, make sure children stay clear of the work zone, and unlock gates before the scheduled arrival time. If a property manager, tenant, HOA representative, or contractor needs to approve access, handle that before the job begins.

Mark anything that should not be disturbed. Low sprinkler heads, cleanouts, decorative lighting, shallow utility lines, and landscape borders can be easy to miss under leaves or debris. If underground utilities may be affected, arrange for the proper utility locating process before digging or grading begins. Never assume that a line is deep enough or inactive because it is not visible.

You should also consider the surface the machine will cross. Grass, pavers, asphalt, and concrete can all be affected by weight, turning, and repeated travel. Protective mats or a different route may help in sensitive areas, though there are situations where some surface impact is unavoidable. A straightforward conversation before booking lets everyone set the right expectations.

Coordinate Hauling, Dumpsters, and Material Delivery

Bobcat service is most efficient when it is paired with a disposal or delivery plan. There is little benefit in moving a large pile from one side of the property to the other if it will only need to be moved again tomorrow. If debris is leaving the site, have the disposal option ready.

For a cleanup or demolition project, this might mean scheduling a dumpster rental before the Bobcat arrives. For smaller or mixed loads, a trailer and hauling service may be a better fit. The right choice depends on the material, the amount of debris, available space, and how long the project will take. Concrete, dirt, roofing, and household junk may have different disposal requirements, so identify the material early.

The same logic applies to deliveries. If you need gravel spread over a driveway, mulch placed around a property, or fill dirt moved into a low area, coordinate the delivery window closely with the Bobcat appointment. Delivery trucks need access too. Make sure there is a safe, clear place to unload without blocking traffic or damaging a neighbor’s property.

A&D Junk Removal LLC can help customers combine Bobcat support with debris hauling, dumpster rental, demolition cleanup, and material delivery. Using one local team for connected parts of the job can reduce the back-and-forth of coordinating several separate providers.

Plan for the Actual Work Window

Ask how the job will be priced and what the scheduled window includes. Some work is best estimated by the hour, while other jobs are priced by the project based on site conditions, material volume, hauling, and labor. A simple dirt-moving job on an open lot may be quick. A similar-sized job behind a narrow gate with multiple obstacles can take much longer.

Do not schedule another critical crew to arrive at the exact same minute the Bobcat work is expected to end. Leave room for cleanup, final grading, loading, and unexpected site conditions. If a concrete crew, landscaper, paver installer, or delivery truck is next in line, tell the equipment provider. That information helps shape a more realistic work plan.

For commercial sites and occupied properties, think through traffic flow as well. A machine loading debris near customer parking or a shared driveway may need to work during a quieter period. For apartment turnovers or property cleanouts, make sure tenants and maintenance teams know where equipment will be operating.

Avoid the Most Common Scheduling Problems

Most delays come down to missing information or incomplete preparation. The gate is locked. The dumpster is not there. The debris pile contains materials that were not mentioned. The operator cannot reach the backyard. Rain has softened the work area. None of these issues are unusual, but they are easier to manage when discussed before the appointment.

If your plan changes, call as soon as possible. Maybe more debris was created during demolition, the delivery truck is late, or you discovered a buried irrigation line. Early communication gives the crew a chance to adjust the schedule, bring the right support, or recommend a better order of work.

The goal is not to make your project complicated. It is to make the equipment time count. A clear work area, honest site details, and a coordinated hauling or delivery plan can turn a stressful cleanup into a job that moves forward in a single visit.

When you are ready to clear debris, move materials, or prepare a property for the next stage, start with the scope and the access. From there, booking the right Bobcat work window becomes a practical step toward getting your space clean, usable, and ready for what comes next.


Dade Grading Project Results That Show Quality

A grading job can look finished at first glance and still create expensive problems after the next hard rain. Strong Dade grading project results are not just about making a lot look flat or moving dirt from one side of a property to another. They show up in how water moves, how equipment can access the site, and how ready the ground is for the next phase of work.

For homeowners, contractors, property managers, and business owners, proper site preparation removes a major source of project stress. Whether you are clearing a yard for a new patio, preparing a lot for construction, cleaning up after demolition, or improving access around a property, the goal is a clean, usable site that does not hold up the work ahead.

What Good Dade Grading Project Results Look Like

The best grading results are practical. The site should have the right shape and slope for its intended use, without unnecessary low spots, loose piles, or uneven access areas. A finished project may not look dramatic in photos, but crews working on the property should immediately notice the difference.

Water has a clear place to go

Drainage is one of the biggest reasons grading matters in Miami-Dade and Broward County. Heavy rain can expose problems quickly. If water collects near a structure, driveway, walkway, or work area, it can lead to muddy conditions, erosion, and delays.

A properly prepared site directs water away from buildings and areas that need to stay stable. The exact slope depends on the property, soil, existing drainage, local requirements, and the plans for the site. There is no one-size-fits-all grade that works for every yard or commercial lot. The right result is one that supports drainage without creating runoff problems for neighboring areas.

The ground is ready for the next crew

Grading is often one part of a larger job. Concrete crews, landscapers, paver installers, roofers, fence contractors, and builders all need room to work safely and efficiently. A site with debris, uneven piles of material, or poor access can slow everyone down.

Good results leave a clear path for the next trade. That can mean removing old fencing and brush before equipment arrives, hauling away demolition debris, leveling access areas, or delivering base material where it is needed. When those details are handled early, the rest of the project has fewer surprises.

Access is cleaner and safer

A property does not need to be a major construction site to benefit from better access. A soft backyard, a narrow side yard filled with debris, or a rough driveway entrance can make simple work much harder. Bobcat support and material handling can help prepare these areas when the scope and access allow it.

The goal is not to overwork the property. It is to create a practical working area for the job at hand. That may mean clearing a route for materials, removing a damaged shed, or cleaning out a section of the lot so a contractor can start without working around old junk.

Grading Is Only as Good as the Cleanup Around It

Site grading and cleanup are closely connected. Dirt, concrete, tree waste, broken block, old lumber, roofing material, and household junk can all get in the way of equipment and create unnecessary work. Leaving waste on the property after site prep also makes it harder to see whether the area is truly ready.

That is where project support makes a difference. A&D Junk Removal LLC helps customers handle the debris and logistics that often surround a grading or site-prep job. Instead of booking separate companies for cleanup, dumpster rental, hauling, demolition, and material delivery, you can coordinate the services needed to keep the project moving.

For smaller residential jobs, that might mean removing an old playset, shed, or piles of yard waste before a landscaper starts. For a renovation or commercial property, it may involve a dumpster trailer, demolition debris removal, and a clear loading area for incoming materials. The best approach depends on the size of the job, the site layout, and what needs to happen next.

Before-and-After Results Matter More Than Freshly Moved Dirt

Freshly graded soil can make a property look clean, but appearance is only part of the result. Before calling a job complete, take a practical look at the site.

  • Are there visible low spots where water is likely to collect?
  • Is debris removed so the next crew has clear room to work?
  • Can vehicles, trailers, or equipment reach the needed area safely?
  • Are materials placed where they can be used without creating another obstacle?
  • Has the site been left clean enough for the owner to understand what was completed?

These questions matter because cleanup and access problems do not disappear on their own. They usually become someone else’s delay, added labor, or disposal bill. A clean site gives you a more accurate picture of the work completed and helps prevent last-minute scrambling before the next scheduled service.

Common Problems That Hurt Project Results

One common mistake is treating grading as a quick fix for standing water without identifying where the water should go. Filling a low area may simply push water toward a home, a neighbor’s lot, or another low point. Drainage decisions should account for the full property and any applicable local requirements.

Another issue is starting equipment work before unwanted materials are removed. Buried concrete, scrap metal, old landscape edging, and construction debris can interfere with grading and damage equipment. Clearing the area first is often faster and safer than stopping midway through the job to deal with hidden waste.

Poor scheduling can also create avoidable trouble. If demolition debris is still sitting on the site when fill, gravel, or other materials arrive, valuable working space disappears. On tight properties, it helps to plan the order of operations: remove what is in the way, prepare access, bring in materials, and haul away the remaining debris as the work progresses.

When You May Need More Than Basic Site Preparation

Some projects require engineering, permits, drainage design, utility locating, or specialized excavation work. This is especially true when the work affects a building foundation, large drainage changes, property lines, public sidewalks, or underground utilities. In those cases, site support and debris removal still play an important role, but they should be coordinated with the appropriate licensed professionals and local rules.

For straightforward cleanup, material movement, light demolition, dumpster rental, and Bobcat-related site support, the focus is simpler: make the property easier to work on. Clear clutter, remove debris, create room for the job, and keep waste from taking over the site.

Plan for a Cleaner Start and a Better Finish

The fastest projects are rarely the ones that rush through the first day. They are the ones that make room for equipment, materials, and workers before the schedule gets tight. A quick walkthrough of the property can reveal what needs to be hauled away, where a dumpster trailer can sit, and whether access needs attention before work begins.

If your property has old debris, demolition waste, unwanted structures, or material piles standing between you and a finished project, handle those obstacles early. A clean, accessible site gives every contractor a better place to work and gives you a clearer path from project plans to real results.

Demolition Services That Keep Projects Moving

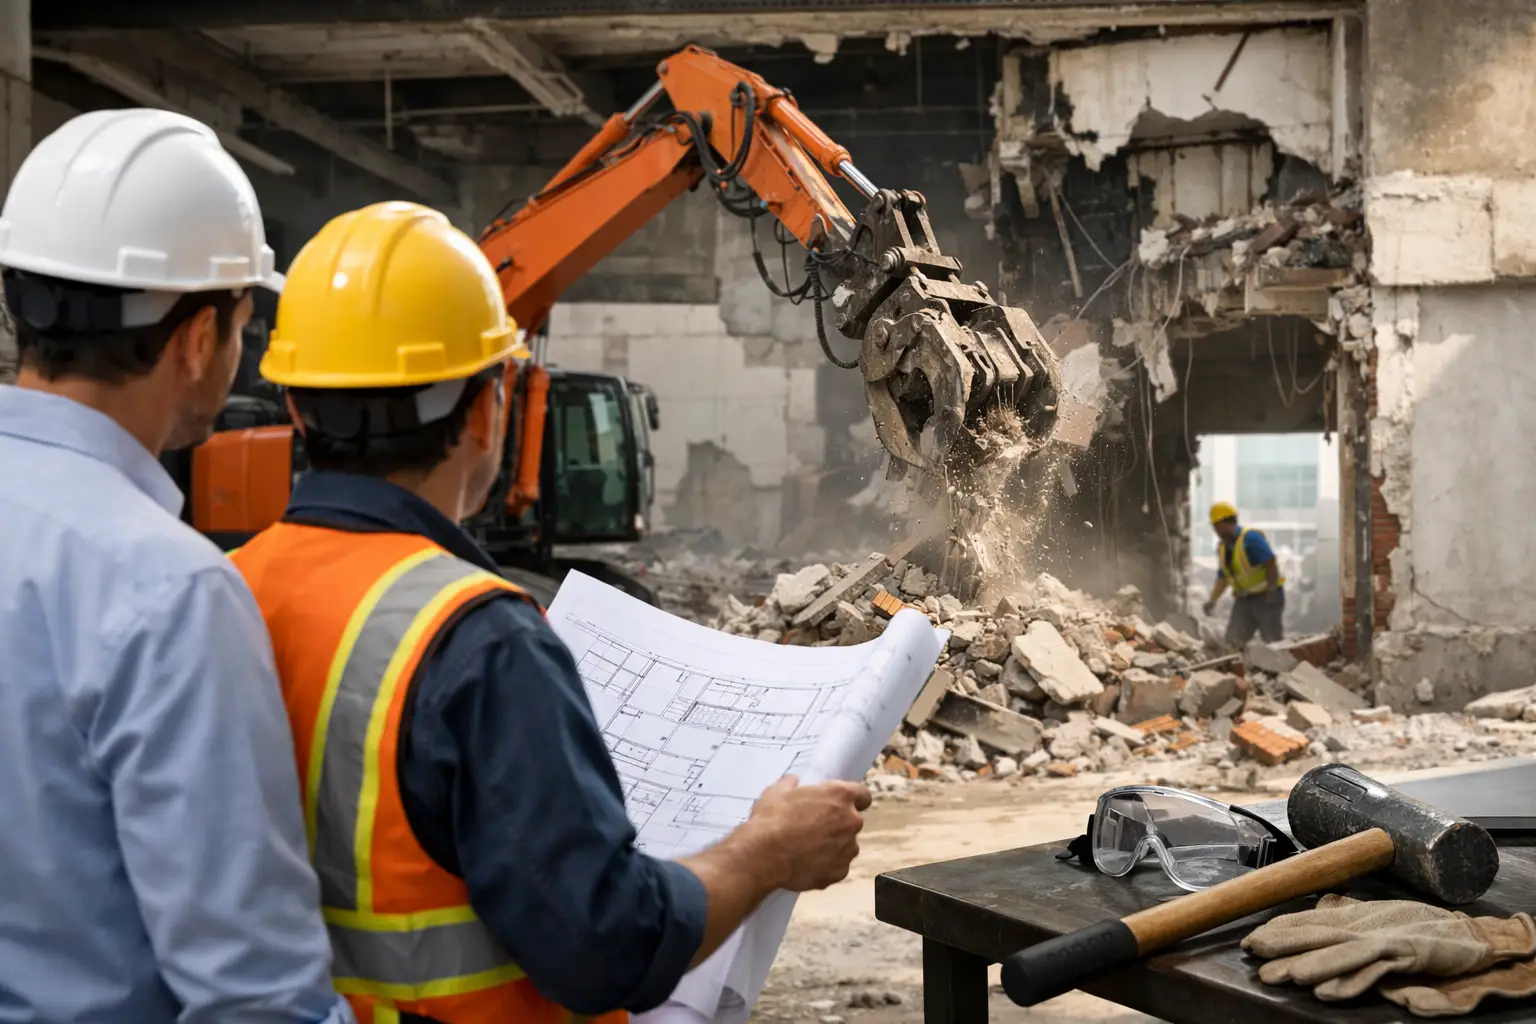
A worn-out kitchen, damaged shed, old flooring, or unwanted concrete patio can hold up an entire project. The hard part is rarely deciding what needs to go. It is figuring out how to remove it safely, control the mess, and get the debris off the property without losing days to hauling and disposal. Professional demolition services turn that difficult stage into a clear, manageable job.

For homeowners, property managers, contractors, and business owners, the right crew does more than tear things down. They help prepare the space for what comes next. That may mean a cleaner renovation site, a faster tenant turnover, or a lot that is ready for new work.

What Demolition Services Can Handle

Demolition does not always mean taking down a whole building. In many cases, selective demolition is the better fit. This means removing only the materials, structures, or finishes that are in the way while protecting the areas that will stay.

Interior demolition is common before a remodel. A crew may remove cabinets, countertops, drywall, tile, carpet, bathrooms, built-in fixtures, or nonstructural walls. This gives your contractor a clean starting point without leaving you to carry broken materials to the curb or make repeated trips to a disposal facility.

Exterior work can include sheds, fences, decks, patios, small structures, concrete, old landscaping materials, and storm-damaged items. Commercial and rental properties may need damaged interiors cleared out, abandoned materials removed, or spaces opened up between tenants.

The scope matters. Removing a few cabinets and hauling the debris is very different from breaking up concrete or taking apart a detached structure. A dependable provider should ask questions about the material, access, size of the area, and what needs to remain untouched before giving you a clear plan.

Why Cleanup Is Part of the Job

Demolition creates debris quickly. Wood, drywall, tile, concrete, metal, insulation, and old fixtures can fill a driveway or work area faster than most people expect. If debris sits too long, it can limit access, create trip hazards, and slow down the trades coming in behind it.

That is why demolition and debris hauling work best together. Instead of coordinating one company to remove materials and another to haul them away, customers can keep the process simple with one team handling the teardown, loading, and disposal. For larger jobs, a dumpster rental may be the practical choice. For smaller projects or tight timelines, direct loading and hauling can keep the site clear without a container sitting in the way.

Responsible disposal also matters. Not every material belongs in the same waste stream. A professional crew can sort and remove debris appropriately, helping reduce the stress of figuring out where everything should go.

The Right Approach Depends on Your Project

There is no one-size-fits-all demolition plan. A bathroom demolition in a condo has different challenges than a backyard shed removal in a single-family home. Access, parking, stairs, elevator rules, working hours, nearby landscaping, and shared walls can all affect the work.

For example, a property owner may want the fastest possible removal after a water-damaged cleanup. A homeowner planning a kitchen remodel may care more about protecting floors, surrounding walls, and the path through the house. A contractor may need a crew that can work around a schedule and leave the site ready for framing, plumbing, or material delivery.

Good planning keeps small complications from becoming expensive delays. Before work starts, it helps to identify what is being removed, what must be protected, where the debris will go, and who is responsible for any required approvals or utility disconnections. Structural changes, electrical work, plumbing work, and hazardous materials may require specialized professionals or permits. Do not assume every wall is safe to remove just because it looks simple.

What to Expect From a Professional Demolition Crew

The best demolition jobs feel organized from the beginning. You should know what work is included, how debris will be handled, and what the property will look like when the crew leaves. Clear communication is especially valuable when a renovation has several moving parts.

A practical process usually starts with a look at the job and a discussion of your goals. The crew considers access for trucks or trailers, the amount and type of debris, and whether equipment such as a Bobcat is needed. They can then recommend the most efficient way to complete the work.

On job day, the team should work carefully around the parts of the property that are staying. Once materials are removed, the debris is loaded or placed in a dumpster, and the work area is cleaned up as much as the scope allows. The goal is not just to make a mess disappear. It is to leave you with usable space and a project that can keep moving.

Speed matters, but rushing is not the same as working efficiently. Fast turnaround is valuable when you have a contractor scheduled, tenants waiting, or materials being delivered. Still, careful removal and a clean haul-away plan protect your property and prevent avoidable headaches.

How Demolition Pricing Usually Works

Most customers want a simple answer: what will it cost? The honest answer is that demolition pricing depends on the job. The size of the structure or area, material type, labor required, access, equipment needs, disposal volume, and cleanup all affect the total.

A small, easy-to-access removal may be straightforward. A project with heavy concrete, multiple floors, limited parking, or a long carry distance will take more time and labor. If materials need to be separated or if a dumpster must be placed in a specific location, that can also shape the estimate.

The lowest number is not always the best value. An incomplete quote can lead to surprise disposal fees, extra labor charges, or a property still covered in debris after the crew leaves. Ask what is included in the price: demolition, loading, haul-away, disposal, and final cleanup. A clear estimate makes it easier to compare options and plan your budget.

Prepare Your Property Before Demolition Starts

A little preparation helps the crew work faster and helps protect items you want to keep. Remove personal belongings, furniture, vehicles, and loose items from the work area. Mark anything that should not be removed, especially if it could be mistaken for debris. If there are access codes, gate restrictions, pets, or building rules, share those details before the appointment.

For interior projects, make sure the path from the work area to the loading area is clear. For exterior work, point out irrigation lines, landscaping features, or areas where equipment should not travel. These details are easy to overlook, but they can prevent delays and damage.

If you are coordinating other trades, schedule demolition early enough that debris can be removed before new materials arrive. A clean site gives everyone more room to work and reduces the risk that new supplies get damaged or buried under old materials.

A Local Team Makes the Logistics Easier

When a project is already demanding, you should not have to chase down separate providers for demolition, dumpsters, junk removal, and site support. A&D Junk Removal LLC helps customers across Dade and Broward counties clear spaces, remove debris, and prepare properties for the next step.

Whether you are removing one room of old finishes or clearing out a larger exterior project, the right support saves time, reduces stress, and keeps the property safer. Get clear on the scope, choose a crew that can handle the cleanup, and give your project the clean start it deserves.

How to Declutter Without Getting Overwhelmed

A crowded garage, spare room, or storage closet can turn into a bigger problem than it looks. What starts as a few boxes, old furniture, and leftover project materials can make it hard to park, clean, move, or use your space the way you want. Learning how to declutter is less about becoming perfectly organized and more about making clear decisions, one area at a time.

The goal is not to empty your whole home in a weekend unless you truly need to. The goal is to remove what is taking up space, creating stress, or getting in the way of your next project. A practical plan makes the work manageable and helps you avoid moving the same unwanted items from one corner to another.

Start With the Space That Will Help You Most

Do not begin by opening every closet or pulling out every drawer. That approach creates a mess before you have a system to handle it. Pick one area with a clear purpose and a clear payoff.

For many homeowners, that is the garage because it can hold old appliances, broken tools, cardboard, yard waste, furniture, and renovation leftovers. For renters, it may be a storage unit or spare bedroom before a move. Property managers may want to start with a vacant unit, curbside pile, or common storage area. Contractors may need to clear job-site debris before the next phase of work can begin.

Choose a space you can finish in one session or divide into sections. A garage can be handled wall by wall. A bedroom can be handled by the closet, dresser, and under-bed storage. Completing one section gives you visible progress and makes the next decision easier.

How to Declutter With a Simple Sorting System

Before you start moving items, set up where each category will go. You do not need a complicated organization system. You need enough separation to prevent keep items from mixing back in with items you are ready to remove.

Use four basic categories:

  • Keep: Items you use, need, or genuinely want to keep.
  • Donate or sell: Clean, working items with realistic value or a clear second use.
  • Recycle: Materials that may need special handling, such as metal, electronics, cardboard, or certain appliances.
  • Haul away: Broken, worn-out, outdated, damaged, or unwanted items that are not worth storing.

Be honest about the donate or sell pile. If an item has been sitting untouched for years, needs repair, or would take more effort to sell than it is worth, it may belong in the haul-away pile. Decluttering works when you make decisions based on your current life, not on the version of life you might get around to someday.

For large projects, keep debris separate from household items. Construction materials, old cabinets, drywall, flooring, lumber, and demolition debris can quickly fill a pickup truck or create a disposal problem. Planning for removal early keeps your work area safer and prevents debris from blocking the project.

Ask Better Questions Before You Keep Something

The hardest part of decluttering is usually not lifting heavy items. It is deciding what stays. When you are unsure, ask questions that lead to a practical answer.

Have you used it in the last year? Would you buy it again today? Does it fit the space you have now? Is it in working condition? If you needed it, would you remember that you own it?

Sentimental items deserve a little more care, but they do not all need to stay. Keep the few items that truly hold meaning and consider taking photos of the rest. A box of random keepsakes is not the same as a collection you enjoy and protect.

It also helps to set limits. Decide that holiday decorations must fit in one bin, tools must fit on one shelf, or extra kitchen items must fit in one cabinet. A limit gives every item a job and keeps clutter from expanding back into the room.

Handle Big Items Early

Large items can stall a cleanup because they are difficult to move and even harder to dispose of. Old couches, mattresses, appliances, exercise equipment, damaged dressers, and bulky patio furniture take up a lot of room. Once they are gone, the rest of the space often becomes much easier to sort.

This is where convenience matters. You may be able to donate an item if it is clean, safe, and in good working condition, but donation centers do not always accept every item. Curbside pickup rules can also be limited, especially for heavy debris, renovation waste, or large loads.

If you have more than a few bulky items, arranging professional junk removal or a dumpster rental can save time and multiple trips. A&D Junk Removal LLC helps customers in Dade and Broward counties clear everything from household clutter to renovation debris, so they can focus on using the space again instead of figuring out disposal logistics.

Do Not Turn Decluttering Into Rearranging

Moving boxes from the garage to the shed or from one bedroom to another may make a room look better temporarily. It does not solve the clutter problem if the items still have no purpose, no place, and no plan.

Only put away items after you have reduced the overall volume. Then assign every keep item a home. Frequently used items should be easy to reach. Seasonal items can go higher or farther back. Hazardous materials, tools, and chemicals should be stored safely and away from children and pets.

Avoid buying bins, shelving, or storage systems until you know what you are keeping. Storage products are helpful when they support a clear system, but they can also become a neat-looking way to hold on to too much stuff.

Make a Plan for Paper, Electronics, and Project Leftovers

Some clutter needs more than a trash bag. Paperwork may contain private information, so shred documents that include account numbers, medical details, or personal identification. Keep only records you need for taxes, warranties, property, insurance, or legal purposes.

Electronics should not be treated like ordinary household waste. Old computers, TVs, monitors, batteries, and printers may require proper recycling or special disposal. The same goes for paint, chemicals, fuel, and certain cleaning products. If you are not sure how to handle an item, do not guess. Check local disposal guidance or use a removal service that understands the right process.

For renovation leftovers, keep only materials you can realistically use. One or two spare tiles, a small amount of matching flooring, or labeled touch-up paint can be useful. Ten partial boxes of materials from projects you will never repeat are usually just taking up valuable space.

Keep the Space Clear After the Cleanup

Decluttering is easier to maintain when your home or property has simple rules. Bring in fewer duplicate items. Break down cardboard as it arrives. Put donation items in one designated bag or bin instead of scattering them around the house. Schedule a quick reset before a move, remodel, holiday season, or major cleanup becomes urgent.

A 15-minute weekly check can prevent a return to the old pattern. Walk through the garage, entryway, storage room, or office and remove what does not belong there. Small habits are more realistic than waiting for the next full-day cleanup.

If the job feels too big, start with one bag, one shelf, or one corner. Clear space creates momentum. Once you can see the floor, open the door easily, or park in the garage again, the work stops feeling like a burden and starts feeling like relief.

How to Plan Selective Demolition Without Delays

A bathroom remodel can turn into a bigger mess than expected the moment a crew removes the wrong wall, damages a floor that was meant to stay, or lets debris pile up in the driveway. Knowing how to plan selective demolition helps prevent those costly mistakes. It gives your project a clear path: remove what needs to go, protect what stays, and have a reliable way to move debris out quickly.

Selective demolition is not about tearing out everything as fast as possible. It is controlled removal. You may need to take out old cabinets while keeping drywall intact, remove tile without damaging plumbing, or clear out a commercial space while preserving wiring, ceilings, and structural components. The plan matters because the details matter.

Start With What Stays

The first question is not what needs to be demolished. It is what needs to remain untouched.

Walk through the space and identify surfaces, systems, and materials that must be protected. This can include flooring, windows, doors, appliances, HVAC equipment, electrical panels, plumbing lines, load-bearing walls, landscaping, or neighboring tenant areas. Take photos before work begins and mark protected areas clearly.

For a home renovation, that may mean covering a hallway floor before debris is carried out from the kitchen. For a retail or office project, it could mean separating the work zone from an occupied area so dust and noise do not disrupt daily operations.

This step is especially important in older properties. What looks like a simple wall may contain plumbing, electrical wiring, ductwork, or structural support. If you are unsure what is behind a surface, pause and verify before removal begins. A little investigation upfront is far less expensive than repairing a broken pipe or cutting a live line.

Define the Scope Before Anyone Swings a Hammer

A good selective demolition plan is specific. Avoid vague instructions such as remove the old bathroom or clear the back room. Instead, identify exactly what will be removed, what will stay, and where the boundary is between the two.

Your scope should cover the materials involved, such as drywall, tile, cabinets, fixtures, carpet, wood framing, concrete, shelving, or ceiling grid. It should also identify any items that need special handling. Refrigerators, paint, chemicals, batteries, electronics, and certain construction materials cannot simply be mixed into a general debris pile.

If you are working with a contractor, confirm who handles disconnection of water, gas, electrical service, and appliances. Demolition crews should not guess whether something has been safely disconnected. Clear responsibility keeps the job safer and avoids delays.

It also helps to decide whether materials will be saved for reuse. Solid doors, usable cabinets, architectural pieces, pavers, and metal may be worth setting aside. Salvage takes extra time and space, so it only makes sense when the materials have real value or a planned destination.

Check Permits, Safety Risks, and Building Rules

Some selective demolition work requires permits, inspections, or approval from a property manager, homeowners association, or commercial landlord. This depends on the scope of work and whether structural, electrical, plumbing, or mechanical systems are involved.

Before scheduling removal, make sure the project is cleared to move forward. If the property is in a condo, apartment building, or shopping center, ask about work hours, elevator reservations, loading areas, noise restrictions, and where dumpsters or trailers may be placed. These rules can affect the entire schedule.

Safety planning should be just as direct. Older homes and commercial buildings may contain materials that need professional testing or specialized handling, including asbestos-containing materials, lead-based paint, mold-affected materials, or damaged insulation. Do not disturb questionable materials until you know what they are and what removal requirements apply.

There is also the day-to-day jobsite safety side. Plan for shutoffs, ventilation, dust barriers, safe walk paths, personal protective equipment, and a place to keep tools away from children, tenants, pets, and customers. Fast work is good. Unsafe work is never worth it.

Build the Work Sequence Around Access and Cleanup

The best demolition sequence is not always the most obvious one. Think about how workers, tools, and debris will move through the property.

In many projects, it makes sense to remove loose items first, then fixtures, then finishes, and finally framing or heavier materials. Clearing the path early reduces trip hazards and gives the crew room to work. It also makes it easier to separate materials if recycling or salvage is part of the plan.

Access is a major factor in South Florida properties where parking, narrow driveways, gated communities, and busy streets can complicate hauling. Decide where a trailer, dumpster, or pickup truck can safely load. Measure gates and side-yard access if debris needs to come through the back of the property. Make sure the route from the work area to the loading point is protected and clear.

For interior jobs, dust control should be built into the sequence. Remove or cover furniture, seal off nearby rooms, and avoid dragging sharp or heavy debris across finished flooring. If demolition is happening while part of the property remains in use, schedule the messiest work during the least disruptive hours.

Plan Debris Removal Before the Debris Exists

One of the most common project slowdowns is waiting until the pile is already too big to figure out where it will go. Demolition debris takes up space quickly, and materials such as tile, concrete, wood, drywall, and cabinetry can become heavy fast.

Choose the removal method based on the size and pace of the job. A small room refresh may only need a haul-away service after demolition is complete. A multi-day renovation may be better served by a dumpster rental or trailer placed on site. Larger site work may require repeated hauling, equipment support, and coordinated loading.

The right choice depends on your access, the type of debris, available space, and how quickly material will come out. A container can be convenient, but it needs a legal and practical place to sit. On the other hand, scheduled junk removal keeps debris from lingering, but it works best when the pickup timing matches your demolition schedule.

Keep clean materials separated when possible. Metal, cardboard, untreated wood, and reusable items may have different disposal options than mixed construction debris. Responsible disposal takes planning, but it can reduce waste and keep the work area more organized.

Estimate More Than Just Demolition Time

When people set a demolition schedule, they often account for the actual tear-out but forget prep, cleanup, loading, and final sweep-out. Those steps are part of the job, not extras.

Give yourself time to protect surfaces, disconnect fixtures, sort materials, load debris, and inspect the area after removal. If a new contractor is scheduled to begin framing, plumbing, flooring, or installation right after demolition, leave enough room for unexpected issues. Hidden water damage, rotten framing, old repairs, or unmarked lines can change the scope once walls and floors are opened.

A practical schedule also considers weather. Rain can slow exterior demolition, make debris heavier, and create slippery loading conditions. In Miami-Dade and Broward County, it is smart to have a covered area or a quick removal plan when storms are likely.

Communicate the Plan to Everyone on Site

A clear plan only works if the people doing the work understand it. Before demolition begins, walk the space with the crew, contractor, property manager, or homeowner. Point out protected areas, access routes, shutoffs, debris locations, and any materials that require special treatment.

Use simple markings where needed. Tape, paint markers, signs, and photos can prevent confusion when several rooms or crews are involved. If the plan changes, communicate the change before work continues. Do not assume everyone received a text message or understands a quick verbal instruction.

For property managers and business owners, let tenants, employees, or customers know what to expect. A notice about noise, parking changes, dust, or temporary access restrictions can prevent frustration and keep the project moving.

Get the Right Support for the Heavy Work

Selective demolition often calls for more than labor. You may need debris hauling, a dumpster or trailer, material delivery, Bobcat support, or help clearing a site before the next phase begins. Coordinating those services through one dependable local team can reduce the number of calls you need to make and keep the job from stalling.

A&D Junk Removal LLC helps homeowners, contractors, and property managers handle demolition debris and site cleanup without adding another headache to the project. The goal is simple: keep the area clear, remove the waste responsibly, and help you stay ready for what comes next.

The best time to arrange cleanup is before the first piece comes down. When your removal plan is ready, your crew can focus on the work in front of them instead of wondering where the next load of debris will go.

Commercial Demolition Guide for a Cleaner Jobsite

A commercial demolition project can make a property better, safer, and ready for what comes next. It can also create a fast-moving pile of concrete, drywall, metal, wood, fixtures, and dust that slows down the whole job if no one has a plan. This commercial demolition guide covers the practical steps that help business owners, property managers, and contractors keep the work organized from the first walkthrough to the final debris pickup.

The biggest mistake is treating demolition as simply “tearing things out.” Good demolition is controlled work. It protects the parts of the building that are staying, keeps people safe, and makes cleanup manageable instead of expensive.

Start With the Scope of the Commercial Demolition Project

Before a crew brings in tools or equipment, get clear on exactly what needs to come out and what must remain. A small interior demolition may involve removing old flooring, cabinets, ceiling tile, non-load-bearing walls, bathrooms, or storefront fixtures. A larger project may include concrete removal, exterior structures, parking lot sections, or a complete building teardown.

Walk the site and identify areas that need protection. That may include electrical panels, plumbing lines, sprinkler systems, elevators, neighboring tenant spaces, windows, finished floors, and structural walls. If a building is occupied or has businesses operating nearby, plan how noise, dust, access, and work hours will be handled.

The scope should also answer a basic question: Is this selective demolition or full demolition? Selective demolition requires more care because you are removing specific materials without damaging the structure or finishes that stay in place. Full demolition may move faster, but it usually creates more material to sort, load, haul, and dispose of.

Check Permits, Utilities, and Site Requirements First

Commercial work often has more rules than a basic residential cleanup. Depending on the project, local permits may be required before walls, plumbing, electrical systems, concrete, or structural elements are removed. Your contractor or project manager should verify the requirements before work begins, especially for properties in Dade and Broward counties where municipal requirements can vary.

Utilities must be addressed before demolition starts. Power, gas, water, communications lines, and fire protection systems can all create serious safety issues when they are active, damaged, or incorrectly assumed to be disconnected. Never rely on a quick visual check. Confirm shutoffs and coordinate with the proper utility providers or licensed professionals.

Older buildings deserve extra attention. Materials such as asbestos-containing flooring, ceiling material, insulation, pipe wrap, or lead-based paint may require testing and specialized removal. If hazardous material is suspected, stop and get it evaluated. Trying to save money by skipping this step can create a health risk, a project delay, and disposal problems later.

Build a Safety Plan That Matches the Job

A commercial demolition site changes by the hour. As materials come down, new trip hazards, sharp edges, exposed openings, and unstable debris can appear. A clear safety plan keeps workers, tenants, customers, and delivery drivers out of harm’s way.

Start by controlling access. Use barriers, signage, and designated entry points so the public does not wander into the work zone. Keep emergency exits clear, and establish a safe path for debris trailers, dumpsters, skid steers, and hauling trucks. On a busy commercial property, this traffic plan matters just as much as the demolition itself.

Dust control is another major concern. Plastic containment, temporary partitions, wet methods where appropriate, and regular cleanup can help keep dust from spreading through the building. This is especially important during interior renovation work in offices, retail spaces, medical facilities, and multi-tenant properties.

Personal protective equipment should fit the work being performed. Hard hats, gloves, eye protection, work boots, hearing protection, and respiratory protection may all be needed. The right protection depends on the materials, tools, and conditions on site. Safety is not a place to guess or cut corners.

Plan Debris Removal Before the First Wall Comes Down

Debris removal is not an afterthought. It is part of the demolition plan. When material has nowhere to go, crews lose time walking it across the site, debris piles block access, and the property looks out of control. That can affect inspections, tenant relations, and the next phase of construction.

Estimate the debris by material type and volume. Clean wood, metal, concrete, drywall, cardboard, fixtures, and mixed construction debris may need different handling. Separating materials can make the site cleaner and may help reduce disposal costs, but it only works if there is enough space and labor to keep the streams separate.

A dumpster can be a good fit for steady debris generation when there is a safe, accessible place to set it. Trailer-based hauling may be more practical for tight sites, short demolition phases, or projects where debris needs to be removed quickly instead of sitting on the property. The right choice depends on access, the type of material, pickup timing, and how much room the jobsite has.

For heavier material such as concrete, block, dirt, or roofing debris, do not overload a container. Weight limits matter. A smaller load hauled safely is better than a container that cannot be moved or creates added fees and delays.

Coordinate Equipment With Access and Timing

Commercial demolition can involve everything from hand tools and carts to saws, skid steers, breakers, and Bobcat services. Bigger equipment can save significant labor, but it needs room to operate safely. Check gate widths, overhead clearance, parking restrictions, surface conditions, and the route from the work area to the loading point.

A skid steer can make quick work of loading heavy debris, moving material, clearing a pad, or preparing a site for the next trade. But it may not be the best choice inside a finished building, in a narrow courtyard, or on a site where noise and vibration must be limited. In those cases, smaller equipment and manual removal may be slower but more controlled.

Timing also matters. Plan debris pickups around demolition milestones rather than waiting until every available space is full. Regular hauling keeps pathways open and helps the job keep moving. For commercial properties with active tenants, early morning, evening, or off-hours service may be worth considering to reduce disruption.

Protect the Parts of the Property That Stay

Even a well-planned demo job can become costly if nearby surfaces are damaged. Protect doors, windows, floors, loading areas, landscaping, and common areas before work starts. If a portion of the property remains open, use containment and clear communication to separate construction activity from daily operations.

Take photos before demolition begins. They create a record of existing conditions and help avoid confusion later. This is useful for property managers, contractors, and owners, particularly when several vendors are working on the same site.

Keep the site clean as work progresses. Removing loose debris, nails, broken glass, and packaging every day is safer than waiting for one large final cleanup. It also gives you a clearer view of the work, which makes it easier to spot damage, incomplete removal, or materials that need special disposal.

Choose a Partner Who Can Handle the Mess

Commercial demolition moves faster when demolition, hauling, site cleanup, and material support are coordinated instead of handled by several disconnected providers. Ask whether your service provider can remove debris promptly, deliver a trailer where it is needed, load heavy material, and adjust service when the job changes.

Clear communication is just as valuable as equipment. You should know what materials can be hauled, where containers or trailers will sit, when pickups are scheduled, and what happens if the project creates more debris than expected. Reliable scheduling helps protect your budget and keeps your crew focused on the work that requires their skill.

A&D Junk Removal LLC helps commercial customers simplify the dirty, labor-heavy side of renovation and site preparation with dependable hauling, dumpster rentals, demolition support, material delivery, and Bobcat services. The goal is straightforward: keep your property clear so the next phase can begin.

Commercial demolition does not need to leave your jobsite buried in debris. With a defined scope, proper safety steps, and a hauling plan in place before work begins, the cleanup becomes one less problem on an already demanding project.

Who Removes Abandoned Furniture in Miami?

A sofa left beside a dumpster, a broken dresser in an apartment hallway, or a mattress sitting at the curb can turn into a problem fast. If you are wondering who removes abandoned furniture, the right answer depends on where it is, who owns the property, and whether the item can be safely moved. The goal is simple: get it handled quickly without creating a disposal issue, a safety hazard, or an expensive surprise.

Start With Where the Furniture Was Left

Abandoned furniture is not always the same as unwanted furniture. If it is on your own property, you generally have the most control over how and when it is removed. If it is sitting on a sidewalk, in a shared apartment area, behind a business, or on a vacant lot, responsibility may belong to a landlord, property manager, business owner, homeowners association, or local government department.

That distinction matters. Moving furniture that does not belong to you can create problems, especially if it is on private property or may be tied to a tenant move-out, eviction, insurance claim, or code enforcement matter. Before arranging removal, take a quick look at the location and determine who controls the space.

For furniture left on your driveway, in a garage, at a rental you manage, or after a renovation, a professional junk removal company is usually the fastest option. A crew can load the items, sweep up the area, and haul everything away without requiring you to rent a truck or figure out where each item should go.

Who Removes Abandoned Furniture on Private Property?

On private property, the owner or authorized manager is normally responsible for arranging removal. That may be a homeowner clearing out a property, a landlord dealing with items left behind by a former tenant, or a business owner cleaning up a loading area.

A junk removal company is a practical choice when the furniture is heavy, damaged, wet, infested, or mixed in with other debris. Couches, entertainment centers, bed frames, recliners, desks, cabinets, and patio furniture can be awkward to move even when they look manageable. One wrong lift can damage a wall, scratch a floor, or cause an injury.

The best removal option also depends on volume. A single chair may qualify for a local bulk pickup program, depending on your municipality and its schedule. A full apartment cleanout, several rooms of furniture, or a pile that includes boxes, trash, and construction debris is usually better handled with a dedicated hauling crew or a dumpster rental.

For property managers, speed matters just as much as price. Furniture left in common areas can block walkways, make a building look neglected, and trigger complaints from residents. Fast removal helps prepare the unit or property for the next tenant and keeps the site clean.

When a Landlord or Property Manager Should Handle It

If furniture is left in an apartment corridor, by a community dumpster, in a condo parking area, or near a rental unit, report it to the property manager first. They can confirm whether it belongs to a current resident, a former tenant, or the building itself.

Property managers often need documentation before anything is removed. A few clear photos, the date, and the exact location can help establish what was found and when. This is especially useful when there may be a dispute over move-out belongings or cleanup charges.

Once the item is cleared for removal, a hauling service can take care of the labor. This is often more efficient than asking maintenance staff to struggle with a bulky sectional or mattress, particularly when there are stairs, tight hallways, or multiple units to clear.

What About Furniture Left at the Curb?

Furniture at the curb may be waiting for a scheduled bulky waste pickup, but that is not always the case. Some cities and neighborhoods have set collection days, item limits, placement rules, or restrictions on what they will take. Other areas require residents to schedule the pickup before putting anything out.

Do not assume that leaving a couch on the curb means it will disappear by the next morning. If the item was placed out too early, in the wrong spot, or without a scheduled collection, it can be considered illegal dumping. That can lead to notices or fines for the property owner.

If you need the furniture gone on your timeline, junk removal is the more dependable route. Instead of waiting through a pickup window or trying to move a heavy item to the curb, the crew removes it directly from where it sits. That is helpful for homeowners without a truck, older residents, busy families, and anyone dealing with a time-sensitive move or cleanup.

In Dade and Broward counties, weather is another reason not to leave furniture outside for long. Rain can turn upholstered furniture into a soggy, heavier mess. Damp materials may also develop odors, mold, or pests, making the cleanup more difficult and less pleasant for everyone nearby.

When to Call the City or Report Illegal Dumping

If furniture has been dumped on public property, in an alley, on a sidewalk, near a vacant property, or somewhere you do not own or manage, reporting it is usually the right first step. Local government sanitation, public works, or code enforcement teams may be responsible for investigating and arranging removal.

Avoid dragging the item into the street, placing it in front of someone else’s property, or adding your own unwanted items to the pile. Those actions can make the situation worse and may turn one abandoned item into a larger dumping problem.

If the furniture creates an immediate hazard – such as blocking a driveway, fire exit, sidewalk access, or roadway – report the issue promptly. The same applies if you see sharp broken pieces, exposed nails, suspected hazardous materials, or signs of pest activity. Safety comes before cleanup.

Choosing the Right Removal Method

There is no one-size-fits-all answer because the right method depends on the item and the situation. Local bulk pickup can work when you have a small number of accepted items and can follow the schedule. A dumpster rental makes sense for a larger cleanup where you will be filling it over several days, such as a remodel, estate cleanout, or major garage purge.

Professional junk removal is often the best fit when you want hands-on help. The crew does the lifting, loading, and hauling, which saves time and keeps you from wrestling oversized furniture through doors, down stairs, or across a property. It is also a good option when abandoned furniture is mixed with bags, appliances, yard waste, or renovation debris.

Before booking, share a clear description of what needs to go. Photos are helpful when possible. Mention the number of items, their location, access challenges, and whether there are stairs, elevators, gates, or tight spaces. Good information upfront helps the removal team arrive prepared and give you a more accurate price.

Do Not Forget About Donation and Reuse

Not every unwanted item is trash. If furniture is clean, safe, complete, and still usable, donation may be worth considering. However, many organizations cannot accept stained mattresses, torn upholstery, heavily worn pieces, or furniture with odors, pests, or structural damage.

Be realistic about condition. A sofa that has been sitting outside in the rain is unlikely to be reusable. In those cases, responsible disposal is the practical choice. A professional removal team can sort through the load and route materials appropriately when possible, while making sure unusable items are taken off your property.

Make the Cleanup Easy on Yourself

Abandoned furniture has a way of making a property feel unfinished, whether it is one old recliner or an entire move-out pile. You do not need to spend your weekend finding a truck, recruiting friends, and making multiple disposal trips. If the furniture is on property you are authorized to clear, a reliable removal crew can take the weight off your shoulders.

A&D Junk Removal LLC helps homeowners, renters, property managers, and businesses clear bulky furniture and debris with straightforward scheduling and no-hassle service. The next step is not complicated: confirm who owns the item and the area, take a few photos, and arrange the removal method that gets your space clean, safe, and usable again.

Post Demolition Cleanup Guide for Safer Sites

The demolition crew may be finished, but the job is not over when the last wall, cabinet, or floor section comes out. Sharp debris, hidden nails, heavy piles, and dust can quickly turn a productive project into a safety issue. This post demolition cleanup guide gives homeowners, property managers, and contractors a practical order of operations for getting the site cleared without creating more work later.

A clean site makes the next phase easier. Whether you are rebuilding a kitchen, preparing a rental unit, clearing a commercial space, or removing a damaged structure, the goal is the same: separate what can be saved, remove what needs to go, and leave a safe work area behind.

Start With Safety, Not the Debris Pile

Before anyone starts loading debris, stop and look over the entire area. Demolition can leave hazards in places that are easy to miss, including exposed nails, loose wiring, broken glass, unstable drywall, and partially disconnected plumbing. Keep children, pets, tenants, and anyone not involved with the cleanup away from the work zone.

Wear sturdy closed-toe boots, work gloves, eye protection, and a dust mask or respirator suited to the material being handled. Long sleeves are a good idea when dealing with insulation, splintered wood, or sharp metal. If the demolition involved a large amount of concrete, tile, or masonry, use proper lifting techniques and avoid overloading wheelbarrows or bins.

Do not assume every material is safe to handle. Older properties may contain asbestos-containing materials, lead-based paint, mold-damaged materials, or other regulated waste. If you suspect a hazardous material, pause the cleanup and have it evaluated by a qualified professional. Regular hauling is not the right answer for every type of debris.

Post Demolition Cleanup Guide: Sort Before You Haul

The fastest way to make a cleanup harder is to throw everything into one pile. Sorting as you go helps control costs, keeps reusable materials out of the landfill, and prevents a dumpster or trailer from filling up with items that require a different disposal method.

Set aside a clear area for each material type. The exact categories depend on the project, but most post-demolition jobs include:

  • Wood, drywall, insulation, and general construction debris
  • Concrete, brick, tile, dirt, and other heavy materials
  • Scrap metal, including pipes, framing, appliances, and fixtures
  • Salvageable items such as doors, cabinets, hardware, and lumber
  • Materials that need special handling, including paint, chemicals, batteries, fluorescent bulbs, or suspected hazardous waste

Heavy debris deserves special attention. Concrete, block, soil, and roofing material can add weight quickly, and many disposal options have weight limits. A trailer or dumpster that looks only half full may already be too heavy to haul legally or safely. For a major tear-out, ask about the right container size and whether heavy material should be loaded separately.

Salvage is worth considering, but only when it is realistic. Clean cabinets, solid doors, usable fixtures, and scrap metal may have value. On the other hand, holding onto damaged materials because they might be useful someday can slow down the project and clutter the site again. Keep what has a clear purpose. Let the rest go.

Work From the Inside Out

Once materials are sorted, clean the job in a logical order. Start inside the structure, then move toward exits, walkways, driveways, and exterior work areas. This keeps workers from dragging debris back across a space that has already been cleared.

Begin by collecting large pieces that can be safely carried or loaded. Flatten cardboard, break down light materials where appropriate, and remove loose items from corners, closets, and behind remaining fixtures. Place nails, screws, shards of glass, and small sharp pieces in sturdy containers instead of loose bags that can tear.

After the large debris is gone, sweep the area thoroughly. A shop vacuum can help with fine dust and fragments, but use one with proper filtration if the project produced a lot of drywall or construction dust. Wet mopping may be useful on hard surfaces after dry debris is removed, though it is not a substitute for controlling dust during demolition.

Outside, check the ground carefully. Nails and screws often end up in grass, gravel, mulch, and along fence lines. A rolling magnetic sweeper is especially useful after removing wood framing, roofing, or metal components. It is a small step that can prevent tire damage, foot injuries, and unhappy tenants or neighbors.

Protect the Property While Cleanup Is Underway

Cleanup is not only about getting rid of waste. It is also about preventing damage to the parts of the property that remain. Cover floors that are staying, protect door frames and walls near travel paths, and keep debris away from drains. Dust, grout, small chunks of drywall, and concrete residue can cause expensive plumbing issues if they are washed into sinks, toilets, or storm drains.

Pay attention to access routes too. If debris has to cross a driveway, lobby, hallway, or landscaped area, use a clear path and avoid repeated trips over the same vulnerable surface. In South Florida, afternoon rain can turn loose dirt, drywall dust, and debris into a slippery mess fast. Keep tarps available and do not leave lightweight debris unsecured outside.

For occupied homes, apartment buildings, and commercial properties, communication matters. Let people know where the loading area is, when hauling will happen, and which entrances should stay clear. A cleanup crew that works quickly but blocks access all day can create unnecessary frustration.

Choose the Right Hauling Setup

The right removal method depends on debris volume, material weight, site access, and how quickly the space needs to be ready. A small bathroom demolition may only require a few pickup loads, while a full renovation can produce enough debris to justify a dumpster rental or dedicated junk removal crew.

A dumpster works well when debris will build up over several days and there is a safe place to set it. It gives you a central location to load material as the project progresses. Junk removal is often a better fit when the debris is already piled up, the property needs to be cleared quickly, or you do not want to handle the loading yourself.

For tight driveways, busy properties, or jobs with unusually heavy material, discuss access before scheduling. Measurements, gate widths, overhead lines, parking restrictions, and the location of the debris pile all affect how smoothly removal goes. A little planning can prevent a crew from arriving only to find that the material cannot be safely reached.

A&D Junk Removal LLC helps customers in Dade and Broward counties with debris hauling, dumpster rentals, demolition support, and Bobcat services when the job calls for more than a few trash bags and a personal vehicle. The practical advantage is simple: one dependable team can help move material, clear debris, and keep the project moving.

Do a Final Walk-Through Before the Next Trade Arrives

Before painters, installers, plumbers, or flooring crews begin, walk the site slowly. Look for loose fasteners, piles left behind in cabinets or crawl spaces, damaged surfaces, and debris near electrical panels, drains, or air vents. Check that all walkways are clear and that nothing is blocking exits.

This is also the time to confirm that the space is truly ready for the next task. A demolition site may be clean enough for hauling purposes but still need dust control, surface preparation, or material delivery before construction can continue. Knowing the next step helps you decide how clean the site needs to be today.

A good cleanup does more than make the property look better. It gives the next crew a safer place to work, helps protect the surfaces you are keeping, and takes one more stressful task off your project list. When the debris is larger than your schedule or vehicle can handle, getting reliable help early is usually the easier choice.

A Miami Retail Cleanout Example That Works

A retail space can go from stocked and operating to full of unwanted fixtures, boxes, broken displays, and old inventory in a matter of days. This Miami retail cleanout example shows what a well-organized store cleanout can look like when a lease is ending, a business is relocating, or a new tenant needs the space cleared quickly.

The job is not simply about loading junk into a truck. Retail cleanouts often involve tight deadlines, shared loading areas, building rules, valuable items that need to be separated, and bulky materials that cannot be left by the dumpster. A clear plan keeps the project moving and helps avoid extra costs, delays, or a last-minute rush before turnover.

The Situation: A Store Needed to Be Empty in Three Days

Picture a small clothing and accessories store in a Miami shopping center. The owner had decided not to renew the lease and needed to return the unit in broom-clean condition within three days. Most saleable inventory had already been moved, but the back room was still packed with shipping cartons, damaged racks, old mannequins, shelving, display tables, packaging supplies, and a few broken appliances from the employee break area.

The landlord required the tenant to remove all personal property. The shopping center also had designated hauling hours, which meant the loading area could not be blocked during the busiest part of the day. The owner had a small team but no truck, no trailer, and no time to sort out disposal locations for each type of material.

That is where a professional cleanout crew makes the difference. Instead of asking store employees to lift heavy fixtures, make repeated disposal trips, and lose time on cleanup, the work can be handled in one coordinated project.

Step One: Walk the Space Before Anything Is Removed

A good retail cleanout starts with a walkthrough, not a guess. The crew and business owner should identify what stays, what goes, and what may need special handling. In this example, the owner wanted to keep two cash-wrap counters and several newer garment racks for a future pop-up location. Those items were clearly marked and moved away from the removal area.

The remaining material was sorted into practical groups: reusable fixtures, cardboard and packaging, general junk, damaged furniture, and items requiring separate disposal. This matters because a store cleanout can include more than ordinary trash. Electronics, fluorescent bulbs, paint, cleaning chemicals, batteries, or refrigerated equipment may have disposal requirements that change the plan.

It also helps to inspect access points before moving anything. Can large shelving units fit through the front door? Is there an elevator? Does the building require a certificate of insurance or an approved loading schedule? Are there low awnings, tight alleys, or limited parking spaces for a trailer? Handling those details early prevents the crew from arriving ready to work only to lose hours waiting for access.

Step Two: Clear the Back Room First

In many retail spaces, the sales floor looks manageable while the stockroom tells a different story. The back room is where years of extra signage, expired supplies, damaged product, old paperwork, and shipping material tend to collect. Clearing that space first opens up room to stage items and makes the rest of the job easier.

For this store, the crew began with flattened cardboard, loose packaging, and empty product containers. Then they removed old shelving and broken storage cabinets. Once the back room was open, the owner could make a final pass through remaining bins and folders without working around piles of debris.

This step also protects items that are easy to throw away by mistake. If a business still has paperwork, equipment, spare keys, vendor materials, or products to donate, those items should be pulled aside before hauling begins. A cleanout crew can move quickly, but the owner or manager should be available to answer questions during the first part of the job.

Step Three: Remove Fixtures Without Damaging the Unit

Retail fixtures can be heavier and more complicated than they appear. Wall-mounted shelves, pegboard panels, slatwall, checkout counters, display cases, and storage systems may be attached to studs, concrete, or electrical components. Pulling them out carelessly can leave damaged walls, exposed wiring, or a bigger repair bill at move-out.

In this Miami retail cleanout example, the store had freestanding displays along with wall-mounted shelving. The freestanding pieces were loaded first. The wall-mounted units were removed carefully, with attention to screws, anchors, and any surface damage that could need patching afterward.

Whether fixtures are removed or left behind depends on the lease agreement. Some landlords want the unit returned to its original condition. Others may allow approved fixtures to remain if they are useful to the next tenant. Never assume that leaving a counter or shelving unit behind is helpful. Get written approval when possible.

For locations that need a more extensive reset, cleanout work may be paired with light demolition. Removing old cabinetry, damaged partitions, flooring materials, or built-in displays may require the right equipment and a clear debris plan. It is usually faster and safer to coordinate those services through one provider instead of trying to schedule multiple crews around the same deadline.

Step Four: Load, Haul, and Leave the Space Clean

Once the sorting and fixture removal were complete, the crew loaded the remaining debris into a trailer for hauling. The job included broken displays, unwanted furniture, cardboard, bags of general waste, and small miscellaneous items from the sales floor and back room. The goal was not just to make the space look empty. It was to leave it clear enough for the owner, landlord, or contractor to inspect and move forward.

A final sweep is a small detail that matters. Loose screws, price tags, packaging scraps, dust, and small debris can make an otherwise empty store look unfinished. For a lease turnover, a clean floor also makes it easier to spot wall damage, stains, or repairs that need attention before the final walkthrough.

Responsible disposal should be part of the process. Reusable fixtures may be donated or repurposed when appropriate. Cardboard and recyclable materials should be separated when practical. General debris is hauled away so the business owner is not left dealing with an overflowing dumpster or complaints from property management.

What Made This Retail Cleanout Run Smoothly

The store met its deadline because the work was planned around the space, the building rules, and the owner’s priorities. The crew knew what needed to be saved, had enough hauling capacity for the volume of debris, and worked within the approved loading window.

A retail cleanout can be a same-day job for a small boutique with limited fixtures. It can also take several days for a larger storefront, restaurant, warehouse space, or retail location with built-in displays. The amount of junk is only one factor. Access, demolition needs, disposal requirements, and whether the business is still operating all affect the timeline.

For business owners, the biggest benefit is getting one clear point of contact for the hard work. A&D Junk Removal can provide retail junk removal, dumpster rental, demolition support, and hauling assistance for projects that need more than a few pickup loads. That means less time coordinating labor and more time focusing on the next location, the next tenant, or the next step for the business.

When to Schedule a Retail Cleanout

Do not wait until the final day of a lease if you can avoid it. Schedule the cleanout as soon as you know the move-out date, especially if the property has strict access hours or the job involves large fixtures. Early scheduling gives you time to sell, donate, or relocate usable items before the removal crew arrives.

If you are closing a store quickly, take photos of the space and make a simple keep-or-remove list. Mark anything that must stay, including leased equipment or landlord-owned fixtures. Then let a dependable hauling crew handle the lifting, loading, and disposal.

A cleared retail space gives you more than a clean floor. It gives you room to finish repairs, meet your turnover deadline, and leave the property without a pile of unwanted work following you to the next job.

Best Landscaping Material Delivery Near You

A yard project can get held up fast when the mulch is short, the gravel arrives in the wrong size, or the delivery truck cannot reach the drop spot. The best landscaping material delivery is not just about getting a load of material to your address. It is about getting the right material, in the right amount, placed where it helps your project move forward without extra lifting, cleanup, or delays.

For homeowners, property managers, and contractors in Miami-Dade and Broward counties, that convenience matters. Landscaping materials are heavy, messy, and difficult to transport in a pickup or SUV. A dependable local delivery service can save you multiple trips, protect your vehicle, and keep your outdoor project on schedule.

What Makes the Best Landscaping Material Delivery?

The right delivery service starts with clear communication. Before a truck is dispatched, you should know what material you are receiving, how it is measured, the expected delivery window, and where it can be safely placed. A low advertised price does not help if you end up with a pile of material blocking the driveway or a delivery that arrives after your crew has already left.

Reliable scheduling is especially valuable when several parts of a project need to happen in order. For example, you may need demolition debris removed before bringing in base rock, or you may need fill delivered before a Bobcat can grade the area. Working with a company that understands jobsite flow can reduce the back-and-forth between different providers.

The best service is also realistic about access. Narrow side yards, low tree branches, soft grass, parked vehicles, gates, and overhead wires can all affect where material can be dropped. A quick conversation before delivery prevents avoidable problems on arrival.

Choose the Material for the Job, Not Just the Look

Landscaping materials do different jobs. Ordering based on a photo alone can lead to drainage issues, unstable walkways, or a yard that needs to be redone sooner than expected. Start with the purpose of the area, then select the material that fits it.

Mulch for beds and moisture control

Mulch gives planting beds a clean finished appearance while helping soil retain moisture and limiting weed growth. It works well around trees, shrubs, and flower beds, but it is not a permanent solution. Miami heat, rain, and irrigation break it down over time, so most properties need a refresh periodically.

Keep mulch away from direct contact with tree trunks and plant stems. Piling it too high can hold moisture against the plant and create problems rather than solving them. A moderate, even layer usually looks better and performs better.

Gravel and decorative stone for drainage and durability

Gravel, river rock, crushed stone, and decorative rock are common choices for walkways, side yards, drainage areas, and low-maintenance landscape beds. They hold up longer than mulch, but the trade-off is that they are harder to move later and can spread into grass or nearby areas without proper edging.

For paths or drive areas, the size and type of stone matter. A decorative round rock may look great but shift underfoot. Crushed material generally compacts better for a stable base. If drainage is the main goal, make sure the material and installation plan allow water to move where it needs to go.

Fill dirt, topsoil, and sand for preparation

Fill dirt is often used to raise low spots, support grading, or prepare an area before another material goes on top. It is not the same as topsoil. Topsoil is better for planting because it contains more organic matter, while fill dirt is mainly a structural material.

Sand can be useful for leveling, pavers, and certain drainage applications, but the wrong type can create shifting or washout. If you are preparing a patio, driveway, or paver area, the material underneath is just as important as the finished surface.

Order the Right Amount Before the Truck Arrives

Under-ordering is one of the most common mistakes in landscaping. It may seem safer to buy less, but a second delivery can add time and cost. Over-ordering creates another issue: you may be left with a large pile that has no place to go.

Measure the length and width of the area, then decide on the depth you need. Mulch is commonly spread a few inches deep, while gravel bases and fill areas may require significantly more depth. Sloped areas, uneven ground, and compaction can change the final quantity, so it is smart to allow a reasonable amount for settling and coverage.

Materials are often sold by the cubic yard or by the ton. This is where customers can get confused because volume and weight are not interchangeable. One cubic yard of mulch does not weigh the same as one cubic yard of gravel. When requesting a quote, provide the dimensions of the area and describe what you are building. A knowledgeable delivery team can help confirm whether you need mulch, rock, sand, fill, or topsoil and how much makes sense.

Prepare the Delivery Area First

A little preparation makes delivery faster and safer. Move cars from the driveway, keep pets inside, and clear toys, tools, and loose items from the planned drop area. If you want material placed on a tarp, set it out ahead of time and make sure it is large enough for the full load.

Think carefully about where the pile should go. The closest possible spot is not always the best one. A pile of gravel at the end of a narrow driveway may block access to the garage. Material dumped directly on grass can damage it, especially after rain. And placing heavy stone too close to a fence, drain, or utility box can create an unnecessary headache.

For larger jobs, it may be worth having equipment ready when the material arrives. A Bobcat can move heavy loads much faster than wheelbarrows and shovels, particularly for base rock, fill dirt, or large gravel orders. Coordinating material delivery with site preparation and equipment service helps avoid having supplies sit in the way for days.

Ask These Questions Before Booking Delivery

A good provider should make it easy to understand the basics. Confirm the material type, quantity, price, delivery window, and intended drop location before the job is scheduled. Ask whether the quoted price includes delivery and whether there are access limitations that could affect placement.

It also helps to ask what happens if weather changes the plan. South Florida rain can turn a workable yard into soft ground quickly. A responsible driver may need to avoid entering an area where a loaded truck could get stuck or damage the property. That can be frustrating in the moment, but it is better than repairing ruts, broken pavers, or a damaged lawn afterward.

If your project also involves old fencing, concrete, brush, construction debris, or unwanted materials, plan the removal side at the same time. Clearing the site before new material arrives keeps the workspace safer and makes it easier to see what the project actually needs.

Delivery Is Better When the Whole Project Is Planned

Landscaping is often treated as a simple weekend task until the material starts piling up. A new patio may require demolition, debris hauling, base material, sand, pavers, and final cleanup. A yard refresh may need brush removal, grading, mulch, and disposal of old edging or broken planters.

Using separate providers for every step can work, but it can also create scheduling gaps and extra stress. A&D Junk Removal LLC supports projects with material delivery, junk removal, dumpster rental, demolition, and Bobcat services, making it easier to handle the messy work around the landscape upgrade. The goal is simple: get the old material out, bring the new material in, and leave you with a jobsite that is ready for the next step.

The cheapest load is not always the best value if it arrives late, is placed poorly, or forces you to arrange another truck for cleanup. Look for a provider that answers the phone, gives straight answers, respects your property, and treats your time like it matters.

A well-planned delivery turns a pile of material into real progress. Measure the space, prepare the drop area, confirm the details, and schedule help that can keep the entire project moving without the hassle.